While we’ve all converted at least one room in our houses into a makeshift office during the winter, some of us are continuously brainstorming new and innovative methods to improve our work-from-home setup. Here’s how to quickly and easily turn your Android phone into a free WebCam for Zoom, Skype, Google Meet, and Teams.
Video chat is used for the majority of global communication these days, whether for work or to catch up with pals. Even after a year of delving deeply into the internet and all the changes it has wrought in our way of life, finding a good webcam at a reasonable price remains a challenge.
We need to be well-equipped with the technology that keeps us linked in order to get out of this home-bound predicament and re-join our offices or meet pals outside.
If you’ve been admiring webcams that are just out of your price range or perhaps out of stock, don’t panic; you can easily transform the camera on your Android phone into a fairly reliable webcam for yourself.
How to Make a Webcam Out of Your Android Phone
If you have a modern phone, the image quality should be excellent enough to compete with the default camera on your laptop. Here’s how you can use it to your advantage:
1. Find and download the best Android webcam app.
Look for apps that can turn your smartphone into a webcam in your Google Play store. The apps are available in both free and paid editions. Choose the option that best fits your needs. If you’re not sure which webcam apps to use, here are a few to try:
DroidCamX EpocCam WebCam IP Webcam
This is a DroidCamX-specific tutorial.
Make sure to read the privacy policy before downloading the program. Install the app and follow the on-screen steps to connect your phone and PC. It’s likely that you’ll need to download a driver.
Allow the app to access your camera and microphone after it has been installed. Most of these apps may quickly drain your phone’s battery if used frequently, so make sure it’s plugged in to a charger or an external power bank while you’re using it.
2. Install the DroidCam Client on your computer.
Open your computer’s web browser and navigate to this website. You’ll be taken to the most recent version of the DroidCam client application. To install the program, read and follow the instructions carefully.
Save the file on your computer after you’ve installed and saved it, and then extract the contents. To proceed, open the executable file and follow the instructions by selecting ‘Next.’ Open the DroidCam Client app on your computer once the installation is complete and proceed to the next step.
3. Use the DroidCam Webcam App to connect to the Windows Client App.
Open the DroidCam Wireless Webcam app on your smartphone. After reading the quick start guide, press the ‘Next’ button. Allow it to use and access your phone’s camera and microphone by tapping the ‘Accept’ button. You’ll see a screen indicating that you’re connected to the internet, the IP address of your Android phone, and the port you’re using.
Open the DroidCam Client app on your PC. A section titled Connect over WiFi will appear (LAN). Enter the Device IP and DroidCam Port that are displayed on your Android phone by clicking on it. Click the Video and Audio checkboxes once you’ve connected to ensure a seamless video and audio experience.
4. Get the video feed going.
To start the video conversation on your Android phone, press the Start button on the Windows DroidCam Client. Your Android phone’s camera should show you a preview of the video recorder. If everything goes well, you’ll have a fully functional webcam.
5. For Skype, Zoom, Team, and other apps, use your Android phone as a webcam.
To use your Android phone’s camera with any of the video calling apps, open any program that requires a webcam and change the configuration settings to use your Android phone.
Tips for Getting Better Video Quality from Your Android Camera
Although Android cameras perform better than the default cameras on your computer or laptop, there are a few things you can do to ensure a smooth and professional experience with your Android phone’s webcam:
1. Use your phone’s main camera or back camera.
The main or back camera on most phones produces a higher-quality image than the selfie camera. It also gives you additional zooming and focusing choices, so remove the front-facing selfie camera in favor of your rear camera for the best results. The webcam apps also have video chatting features such as video resolution, orientation, focus, effects, balancing, and quality that can help produce a higher-quality image.
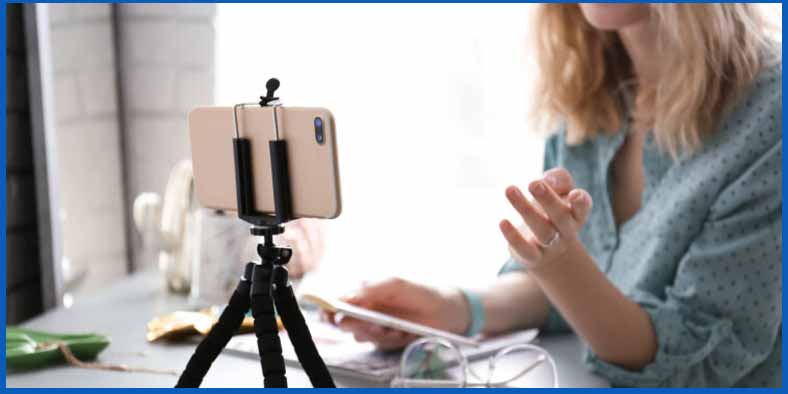
2. Make Sure Your Phone Is Stable
Use a tripod to support your phone or make it stand on a desktop mount to achieve a stable image and video quality. This will aid in the production of professional outcomes.
3. Install Lighting that is Complementary
When capturing a video with your webcam, good lighting is always a benefit. It’s a game-changer, to say the least. When recording from your phone’s webcam, a ring light helps to minimize shadows, brighten your face, and smooth out wrinkles.
4. Invest in a high-quality microphone
In most cases, your air pods or built-in microphone will suffice, but if you’re using a DIY camera, a decent microphone is usually a smart idea. Look for the best mics in your area and pick the one with the highest quality evaluations.
These handy hints will help you improve your home office and video conferencing setup, resulting in a more pleasant experience throughout all of your workplace meetings and presentations.
Check More Informative Articles in Tips & Tricks Section: